
Welcome to the second in our new blog series on Kubernetes! In this series, we explore the world of Kubernetes deployment on Zadara, and how it can be used to manage containerized applications in our AWS-compatible cloud. Whether you’re new to Kubernetes or an experienced user, this series will provide you with valuable insights and best practices for managing your containerized applications in the Zadara cloud. Stay tuned for more exciting content!
Our second blog post will focus on introducing the EKS-D solution on top of the Zadara cloud – we will cover the solution overview, architecture and demonstrate a simplified deployment scenario to emphasize how easy it can be to deploy Kubernetes using our automated blueprints.
Solution overview
Starting from zCompute version 23.08 and above (operating in VSC-mode), Zadara is offering a highly-customizable solution for a self-managed EKS-D cluster automated deployment.
The EKS-D solution is based on the below key elements:
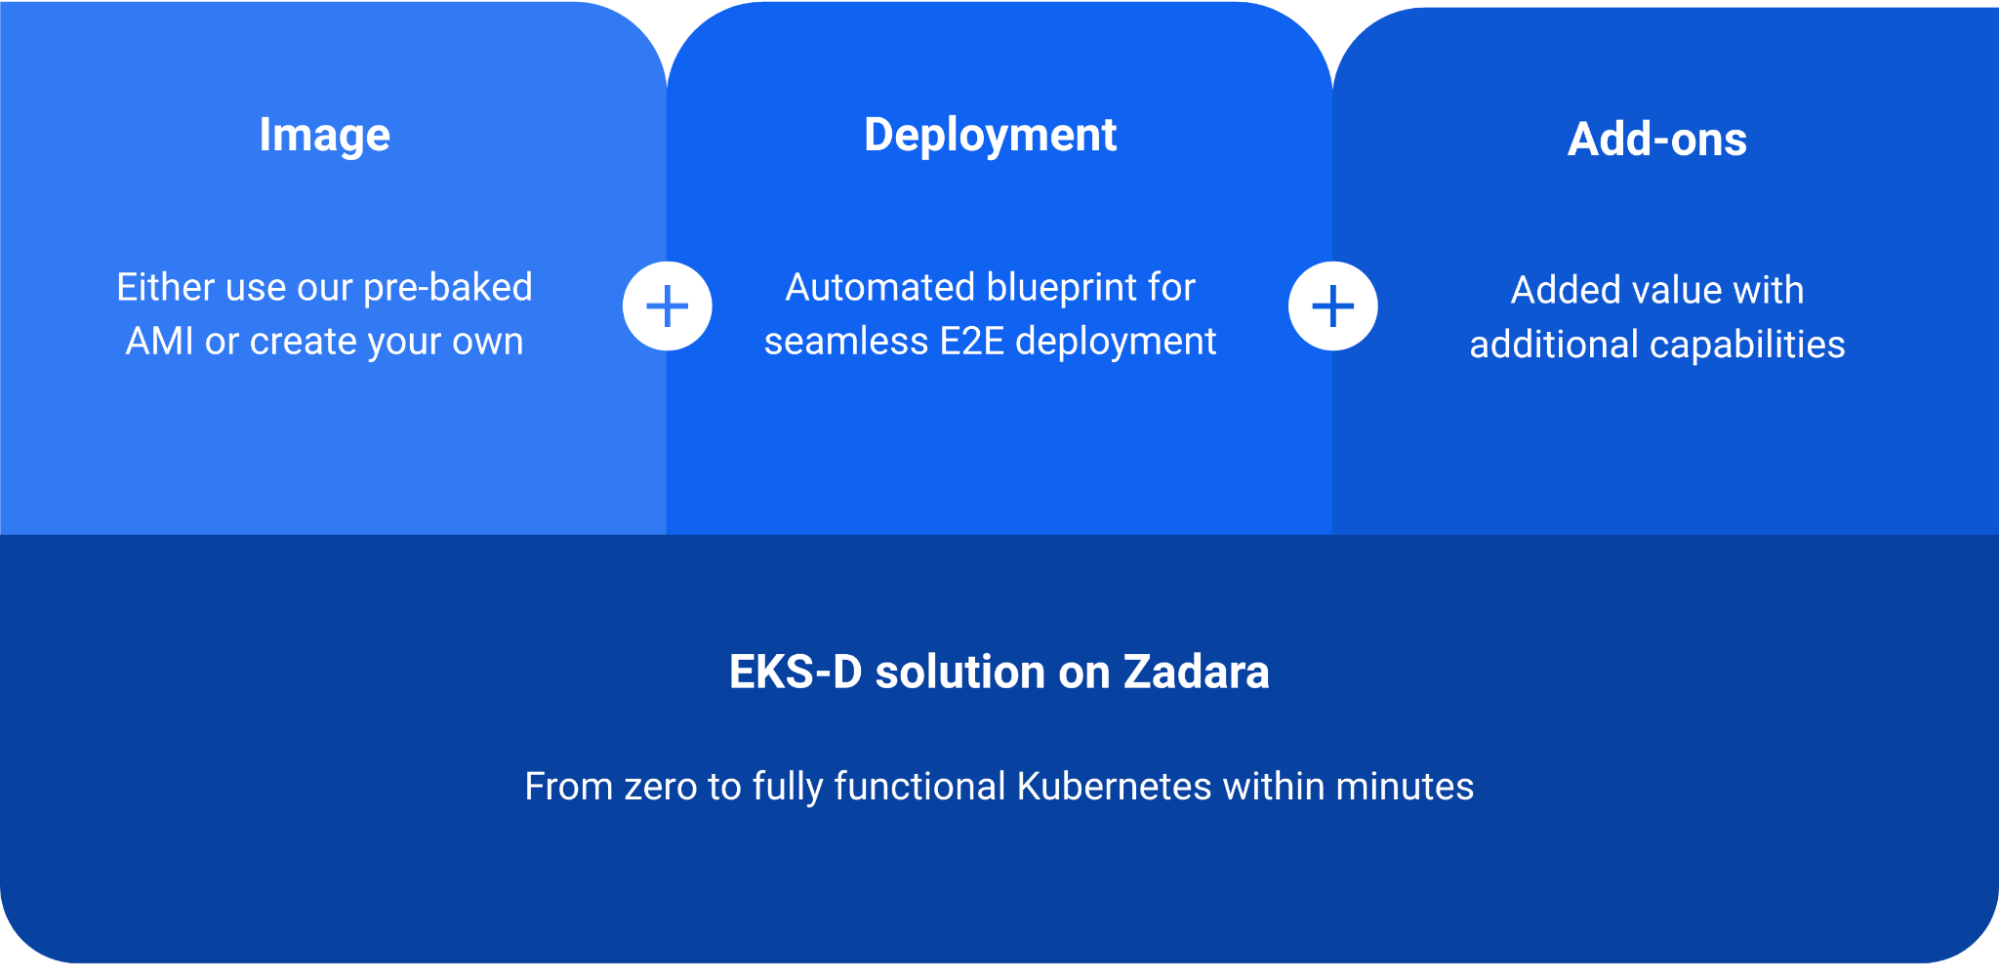
The first element is the EKS-D VM image, which contains all of the Kubernetes prerequisites, EKS-D artifacts and relevant customization features. Zadara follows the same methodology as EKS does by pre-baking these images (one for each EKS-D major release) into AMIs and offer them in each cloud’s image Marketplace, while also providing the actual baking script as an open-sourced Packer project – so customers may review our image-making process and even create their own AMI based on their specific needs.
The second element is the automated deployment script, which consists of two Terraform projects (one for the required infrastructure and another for the actual EKS-D deployment) with an optional wrapper script for one-click deployment. The result of running the automated deployment is a running Kubernetes cluster on the Zadara cloud, and a local kubeconfig file for the Kubernetes admin user.
The third element are the Kubernetes add-ons which are Kubernetes-native applications built into the image and controlled via the automated deployment:
- CNI – networking provider (either Flannel, Calico or Cilium can be used)
- EBS CSI driver – block storage integration
- Load Balancer Controller – load-balancer integration (for both NLB & ALB)
- Cluster Autoscaler – cluster-level dynamic scaling capabilities
- Kasten K10 – application-level backup & restore capabilities
We will dive into each of these add-ons in the upcoming blog posts of this series, but for now just note that while customizable, we enable most of these capabilities by default in order to facilitate their deployment as part of our EKS-D solution, with a ready-to-use out-of-the-box approach.
Reference architecture
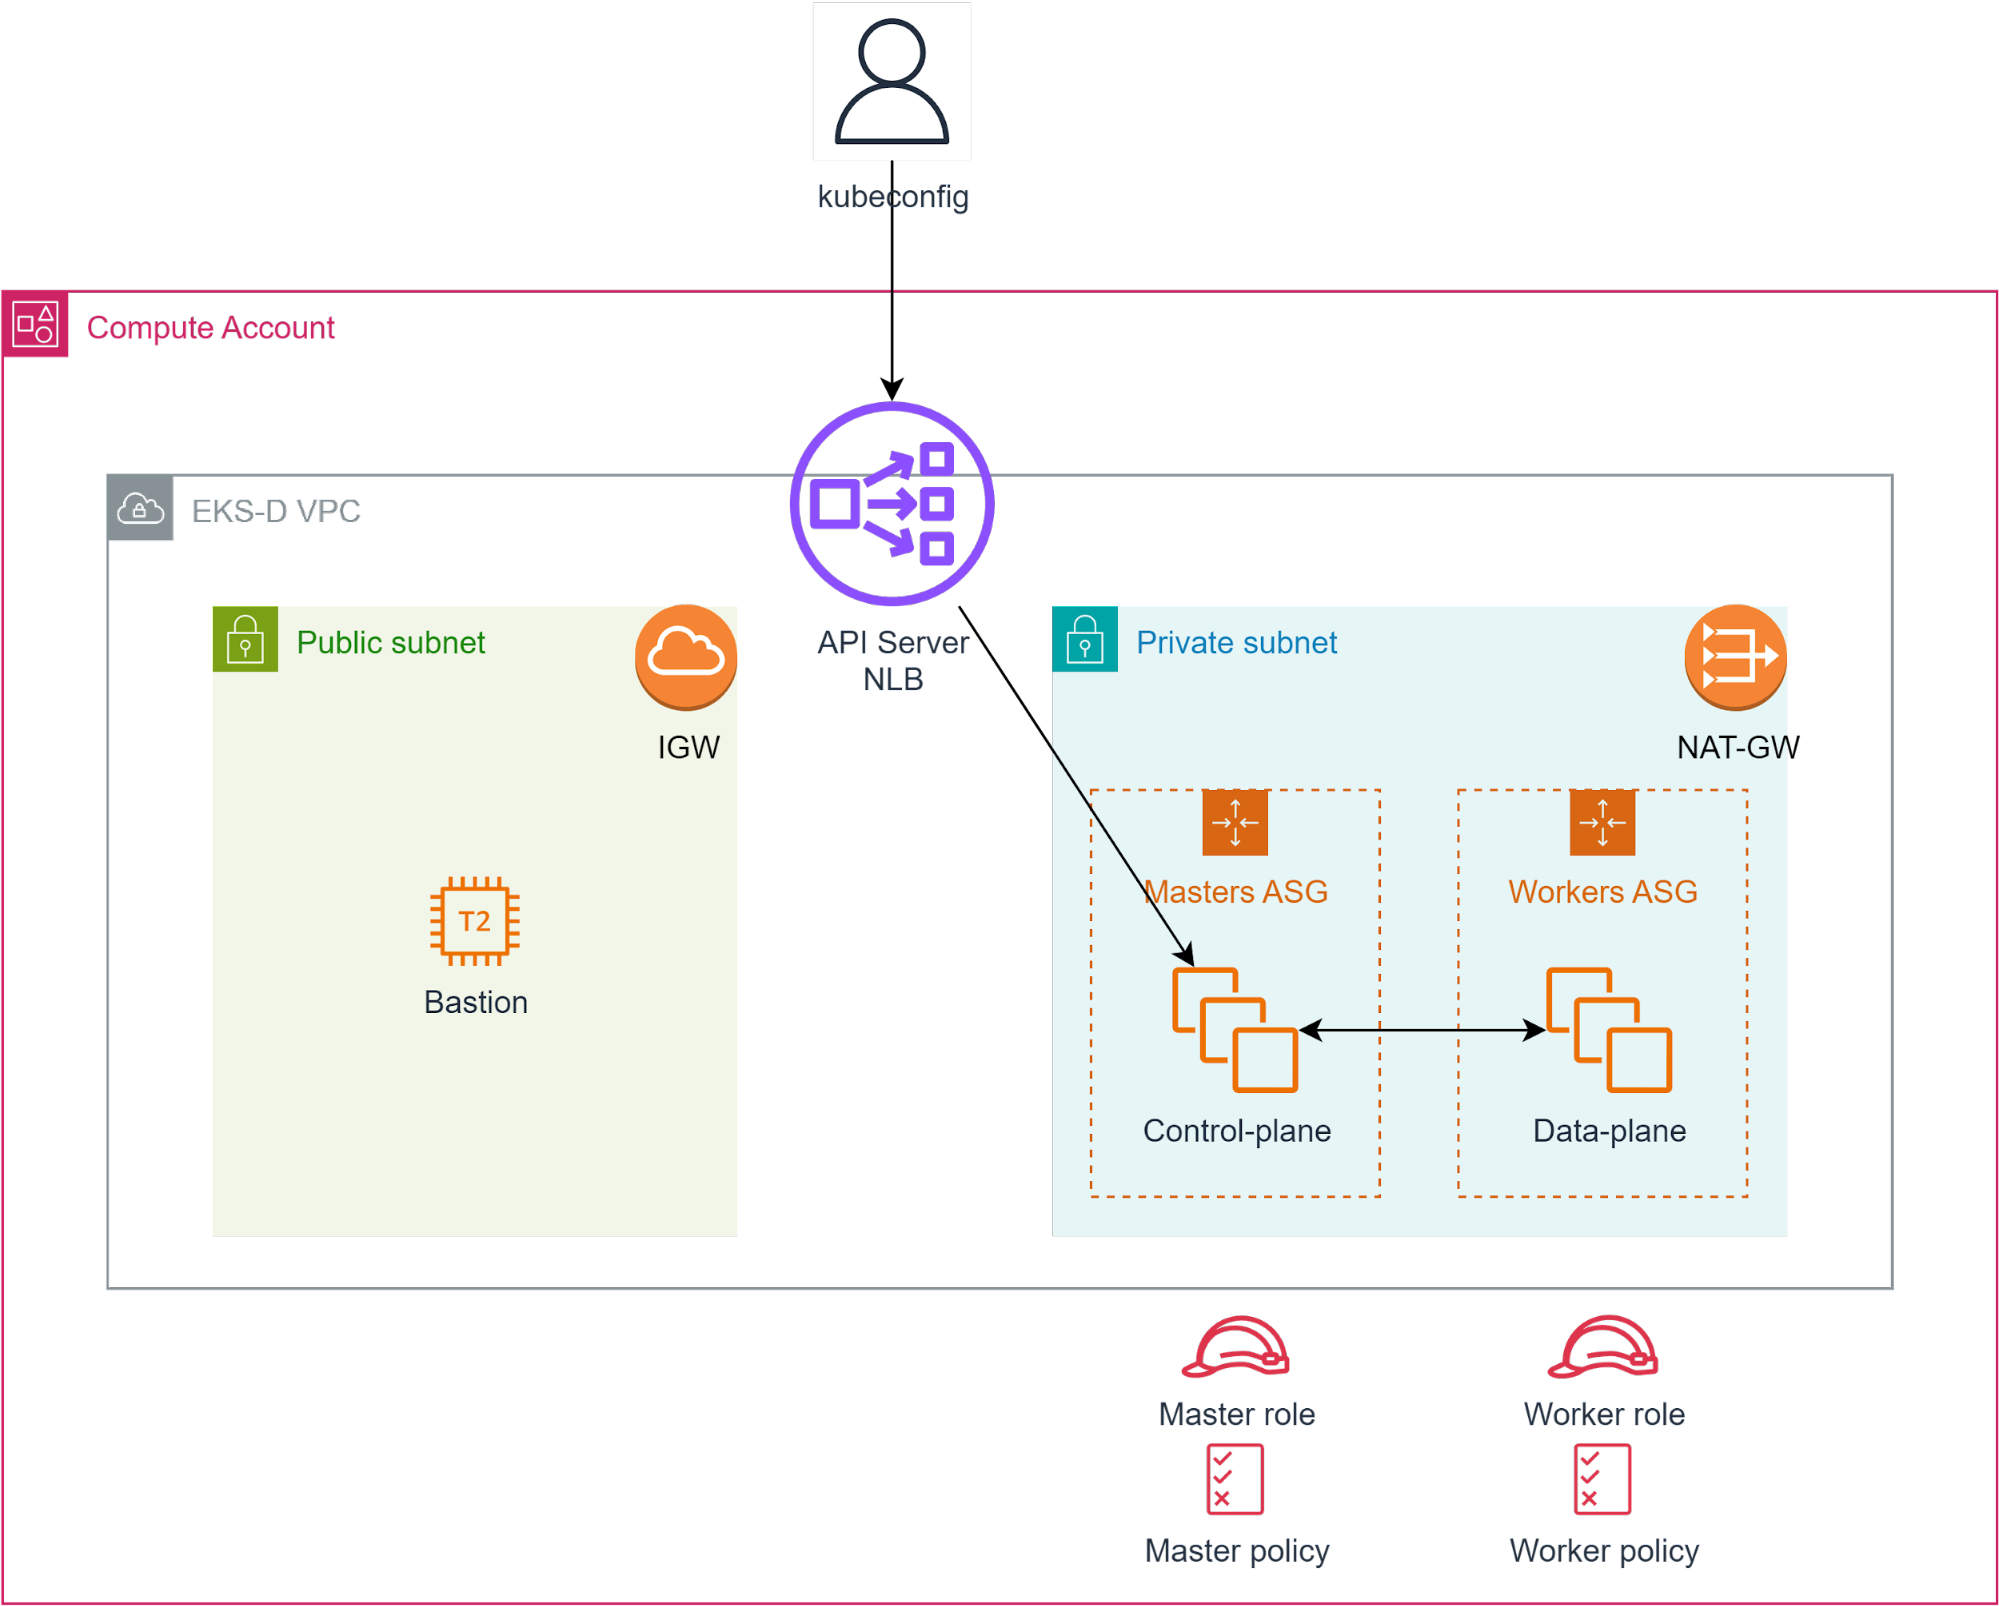
The below diagram shows the high-level end result of the EKS-D automated deployment, consisting of these components which will be created by the Terraform projects:
- Dedicated VPC to contain the Kubernetes environment (CIDR defaults to 192.168.0.0/16 but can be configured otherwise)
- Public subnet equipped with Internet-Gateway
- This subnet hosts a small bastion (jump-server) instance, allowing the user to access the internal subnet’s VMs if needed – by default its security group allows SSH connections from the world, but it can be changed if needed
- This subnet is also used by the Kubernetes API-Server’s Load Balancer (NLB using port 6443 and targeting the control-plane’s VMs on the private subnet) – by default this NLB will get a public IP but it can be changed to internal-only if needed
- Private subnet equipped with NAT-Gateway and routing table which leads to the internet through the public subnet’s Internet Gateway (egress-only connectivity)
- This subnet hosts both the control-plane (masters) & data-plane (workers) VMs, which are controlled by dedicated auto-scaling groups (each one with its own Launch Configuration and configurable capacity)
- IAM policies & roles for master/workers VMs, attached to the instances via instance-profiles – by default allowing for EC2, ELBv2 & ASG API usage by both master & worker VMs, but that can be changed if needed
Deployment prerequisites
Before running the automated deployment workflow itself and as a one-time preparation, make sure to cover all relevant cloud prerequisites as mentioned in the zadara-examples GitHub repository:
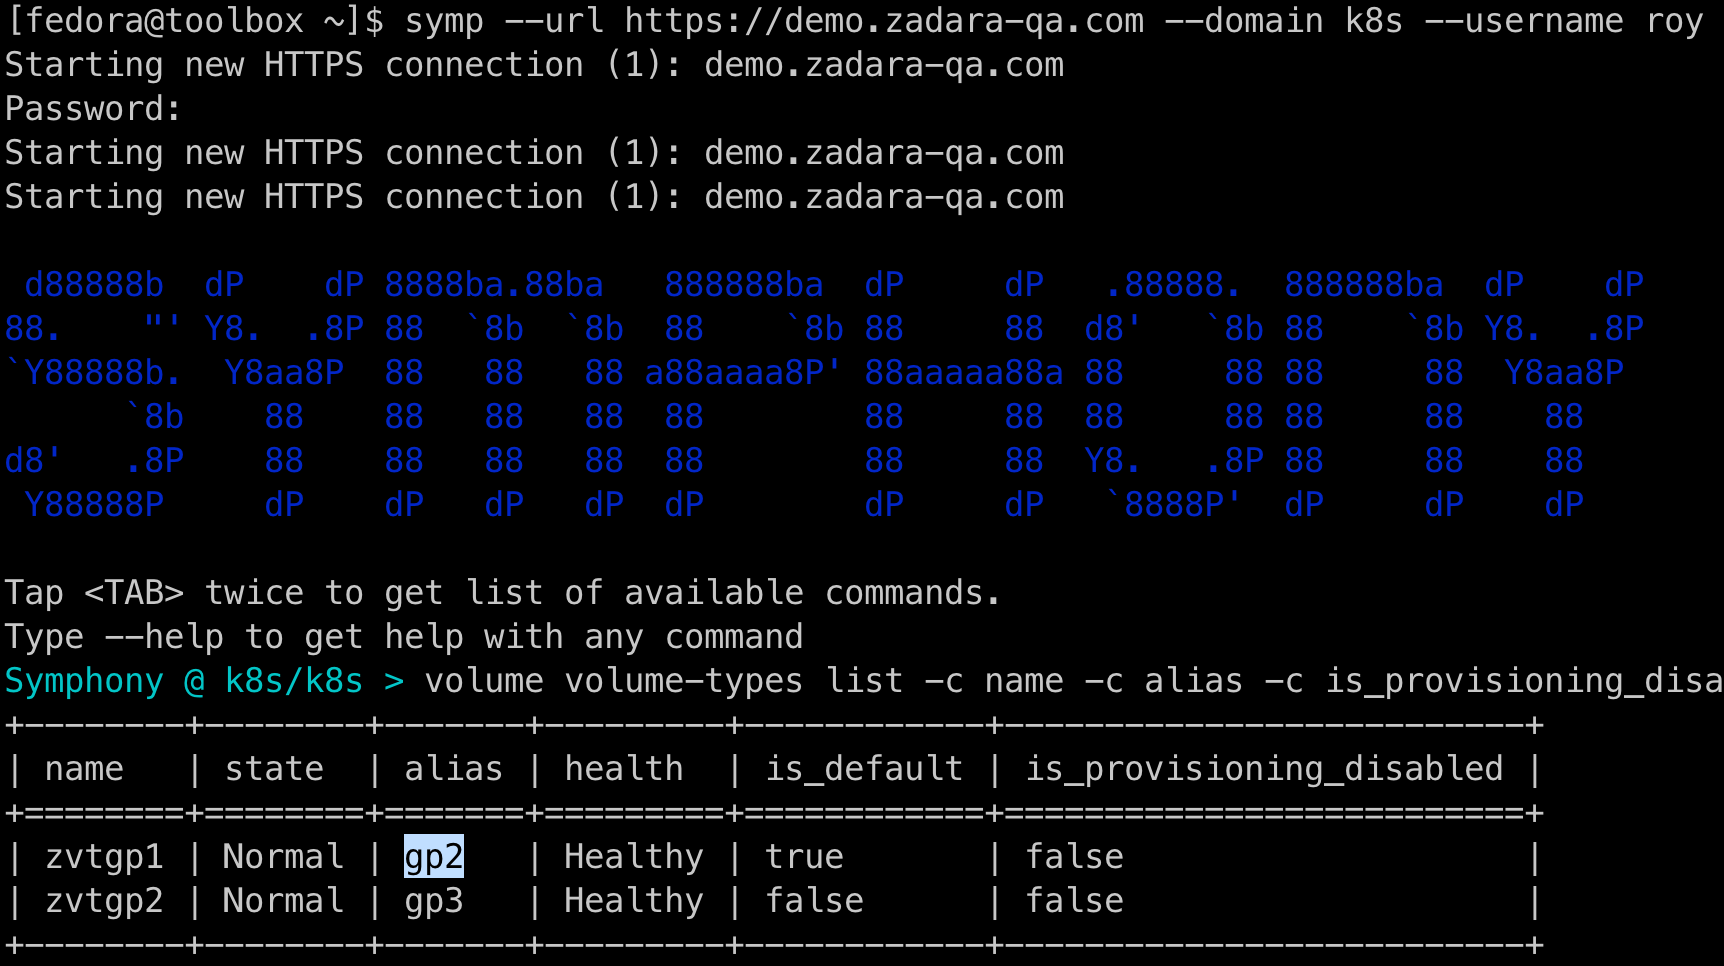
- Get the relevant VSC-enabled VolumeType API alias (note this is not the display name) – in most cases this would be “gp2” which is the default value for the deployment, but you can consult with your cloud administrator or run a Symp command as explained in the documentation to validate non-default values

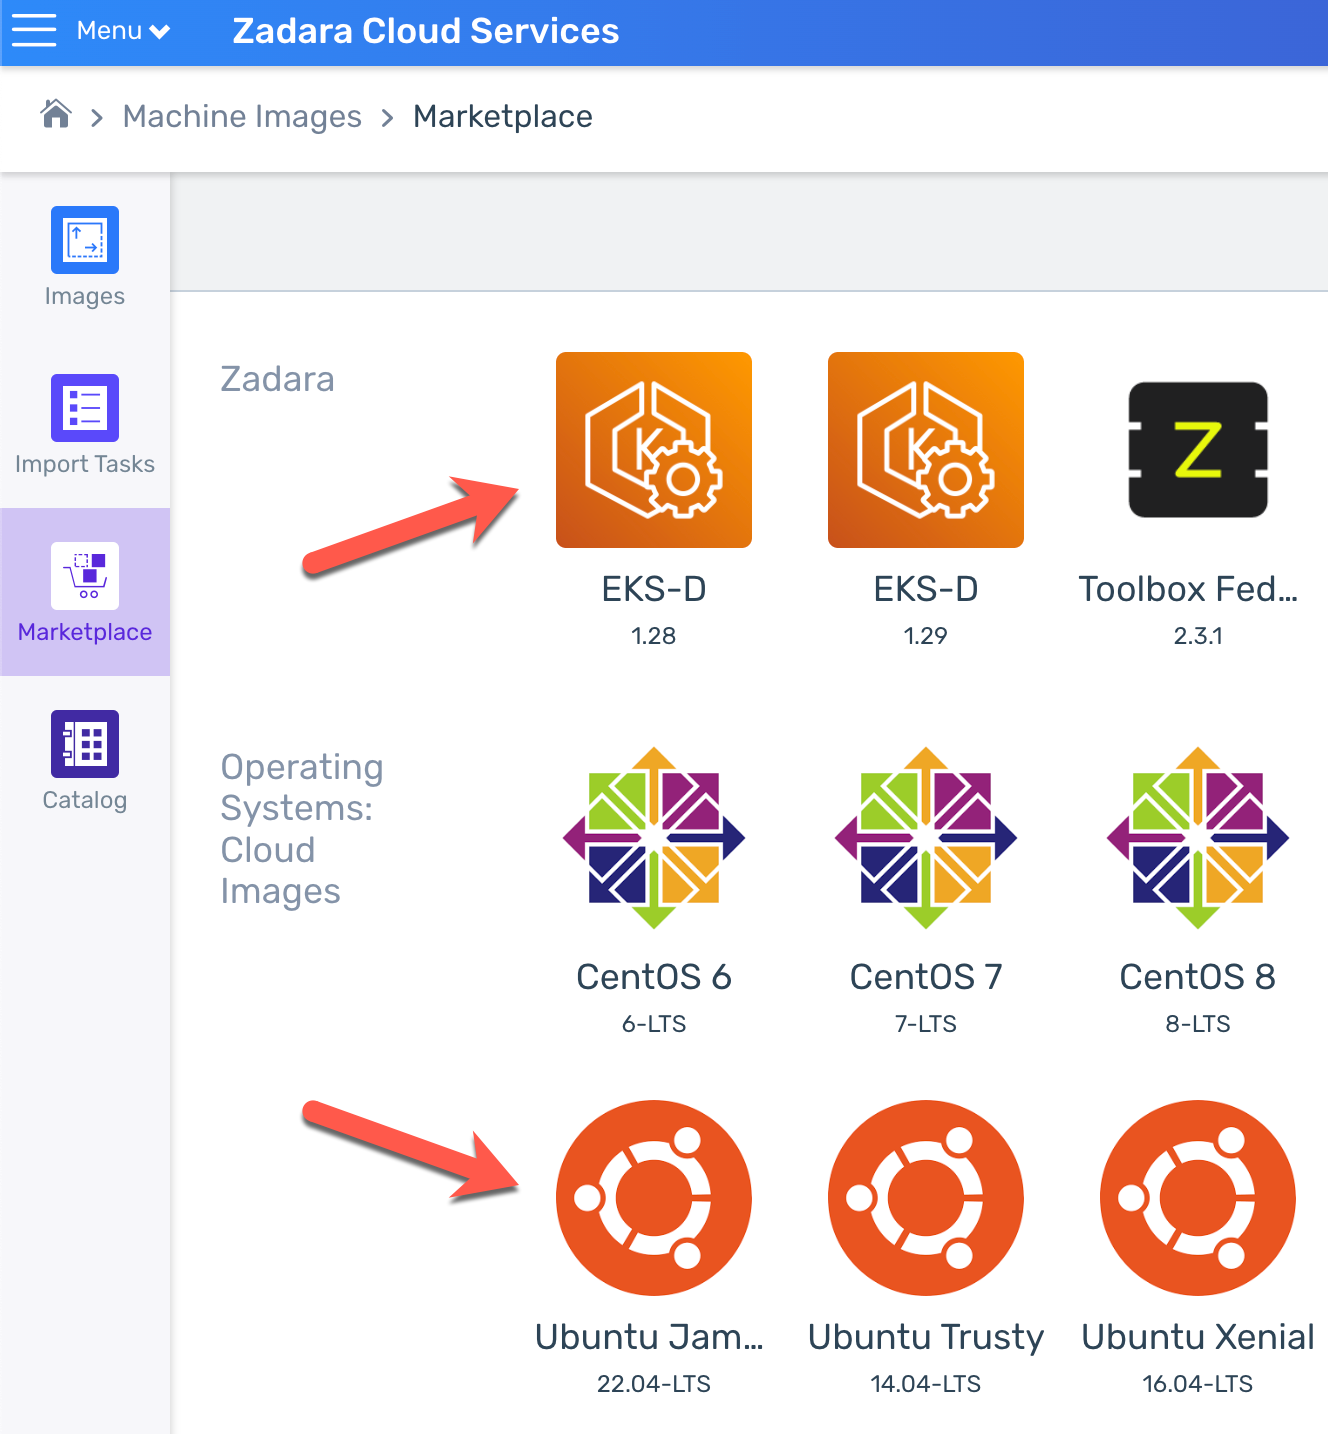
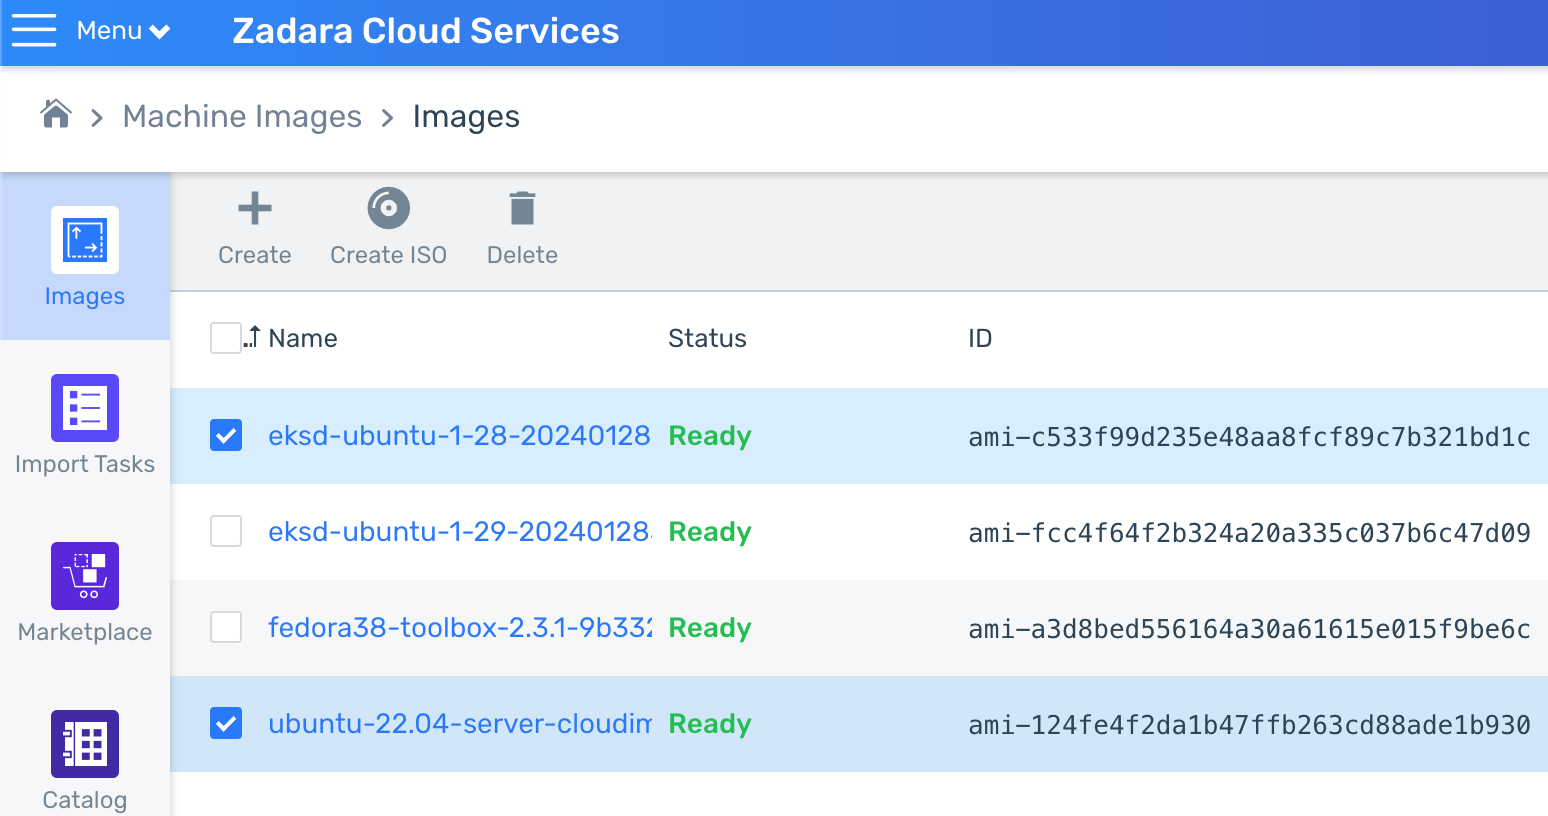
- Download the relevant images – the deployment requires the AMI ids of Ubuntu 22.04 (for the bastion host) and your desired EKS-D version (for the Kubernetes master & workers nodes), both of which you can find in the cloud’s Marketplace if not already in your Images list:

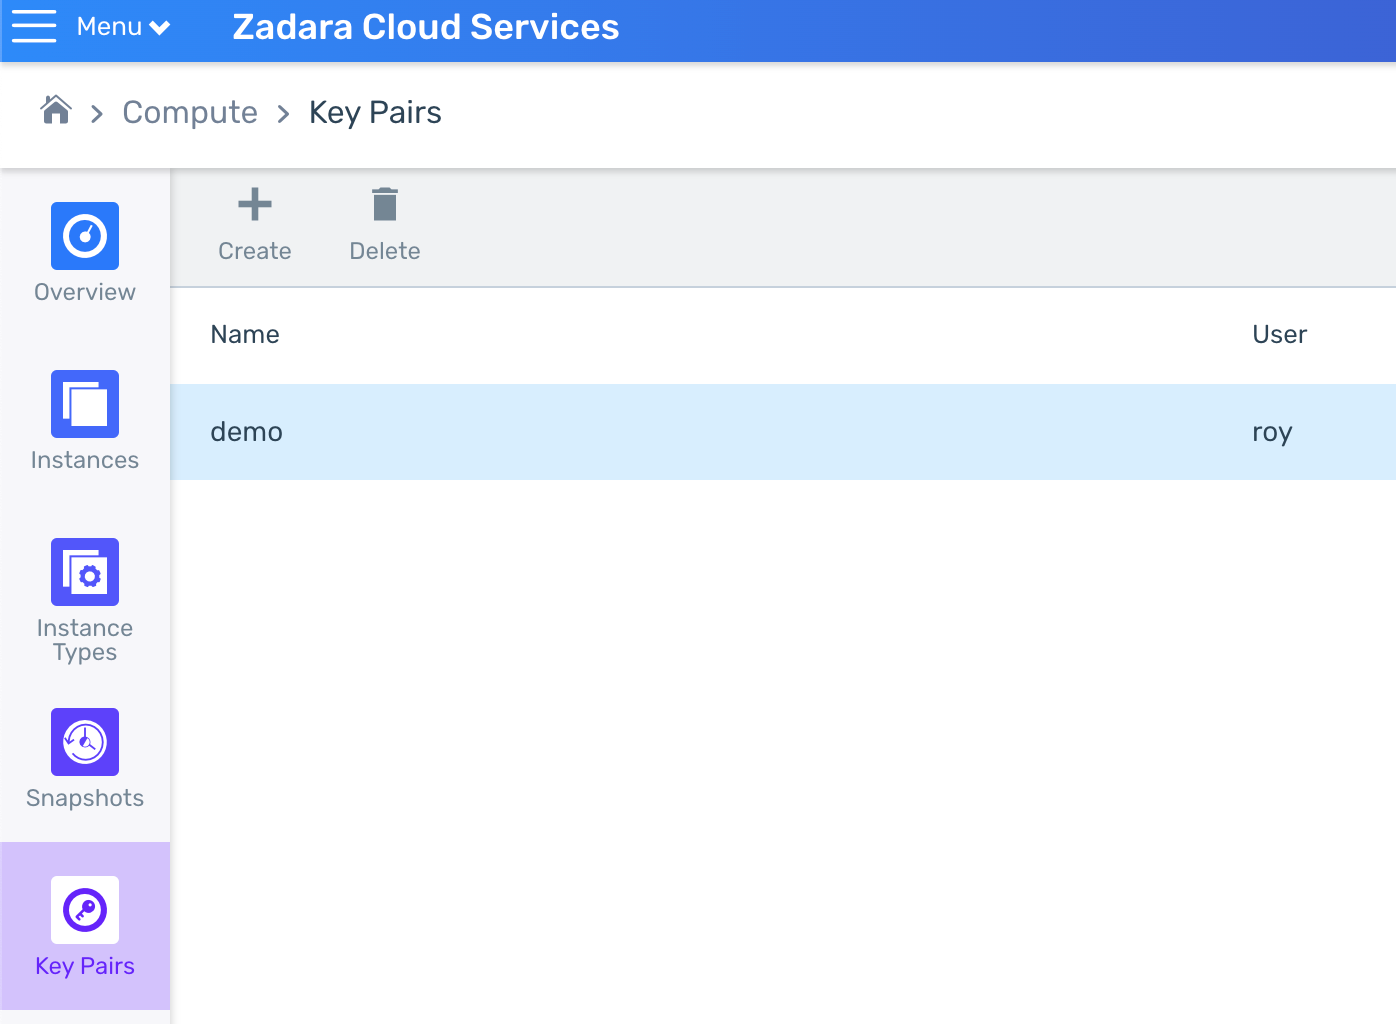
- Create or upload your key-pair/s – these will be used in order to SSH into the bastion, master and worker VMs if necessary (you can use the same key-pair for all, or create different ones):

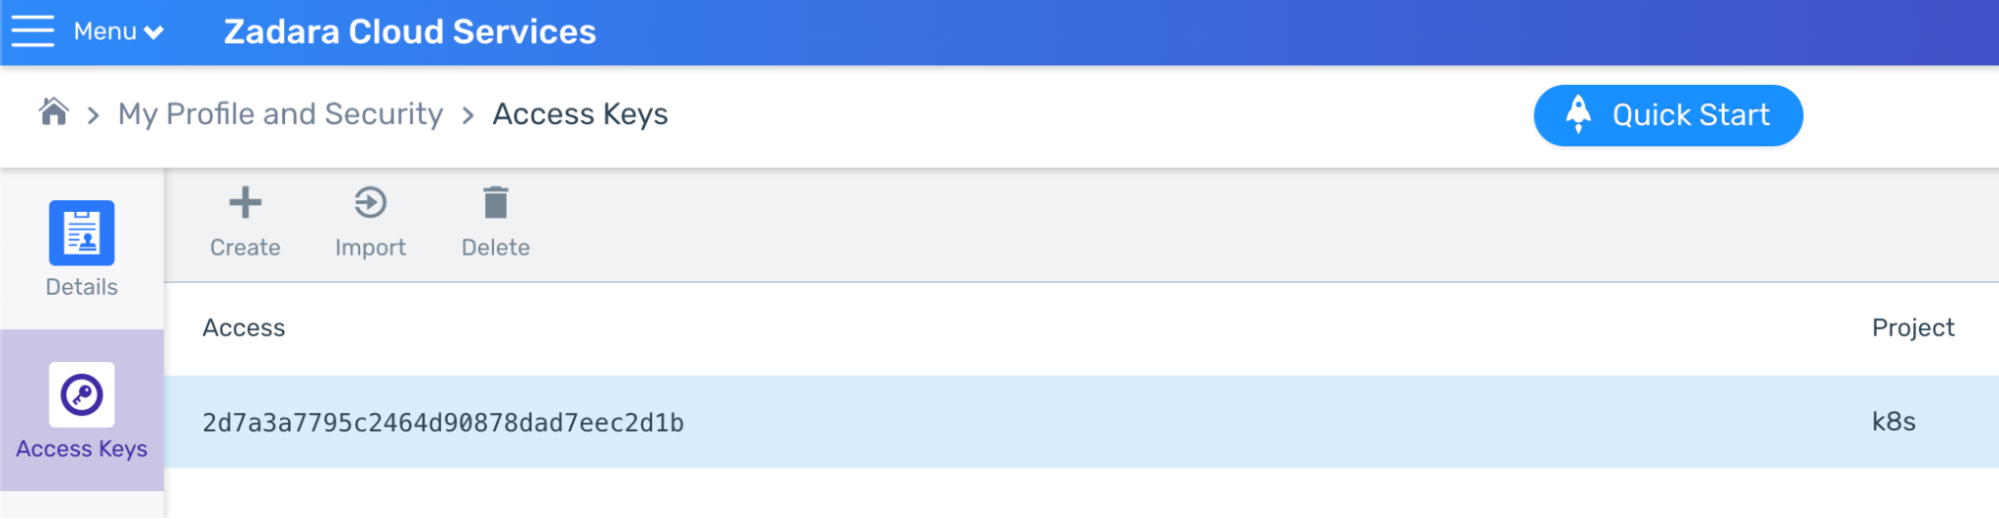
- Create your AWS credentials – save both access & secret keys in a secure location:

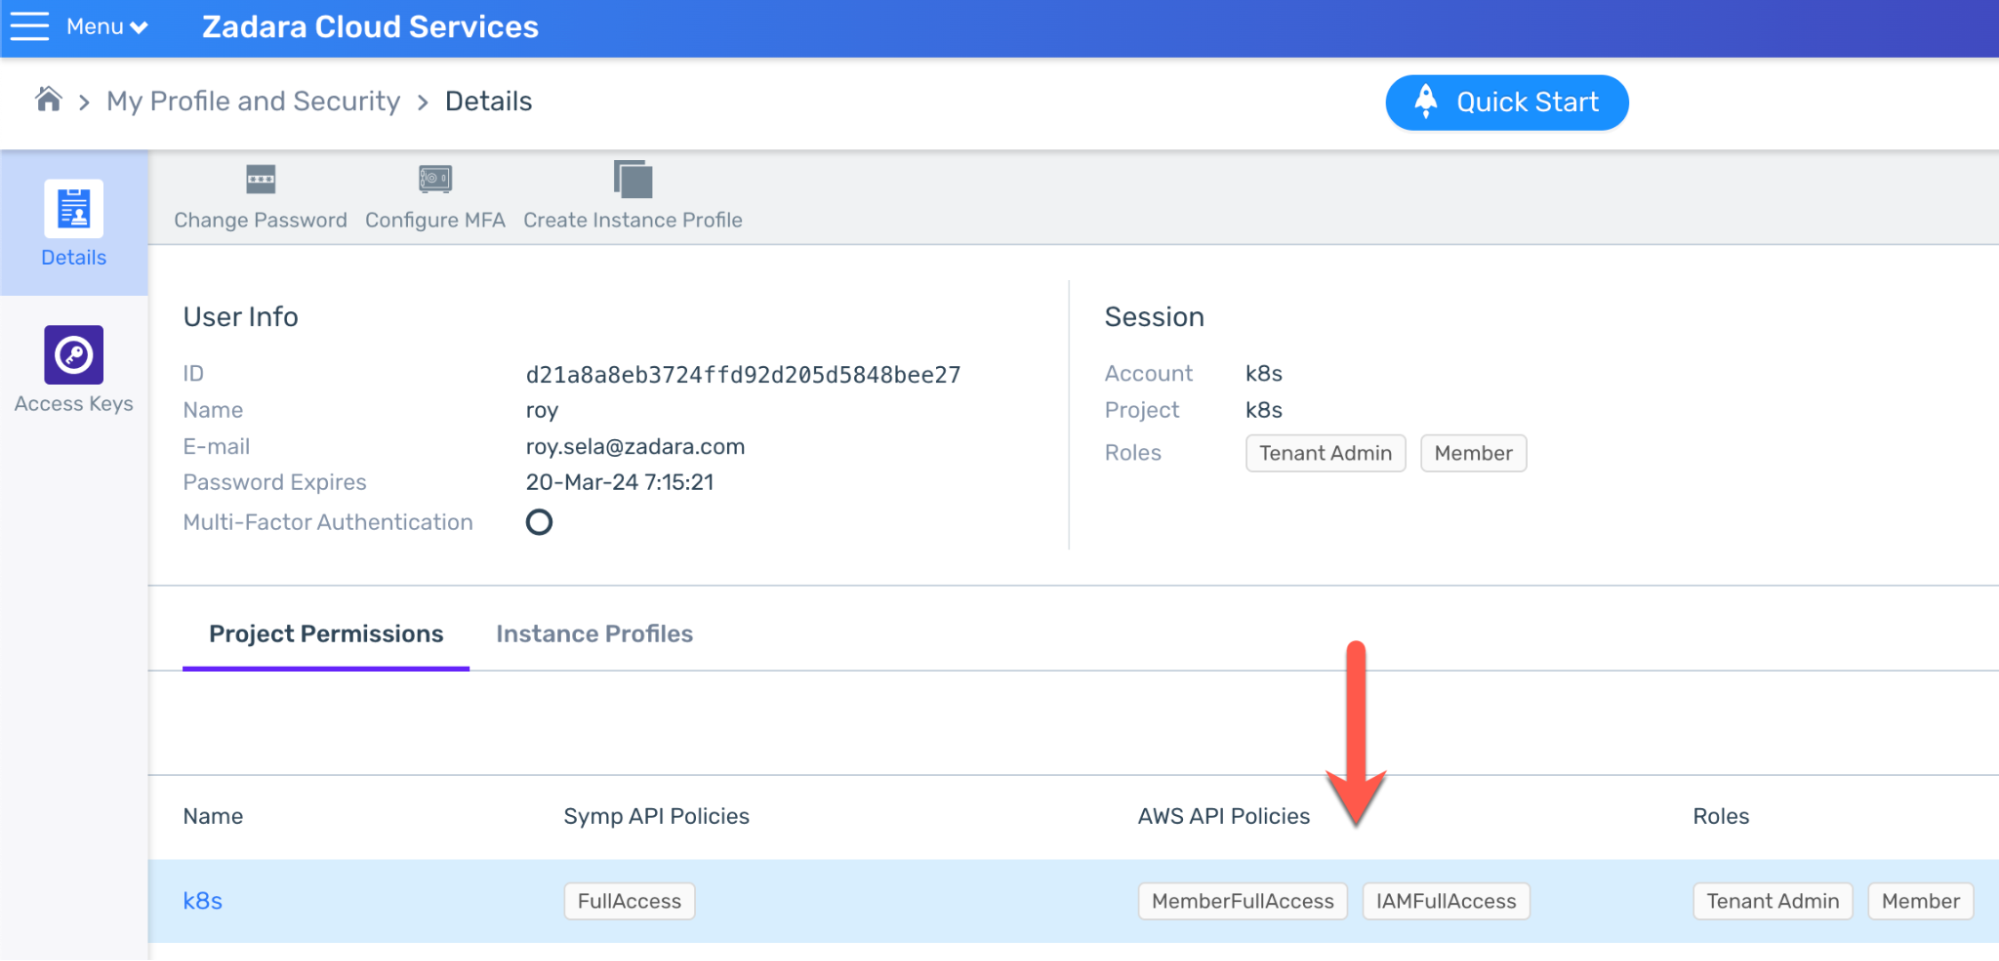
Note your user must have at least MemberFullAccess & IAMFullAccess AWS permissions (or higher one like AdministratorAccess) for the relevant project as this is crucial in order to create the IAM resources later on:
Running the deployment workflow requires a Bash-based executor machine with pre-installed Git as well as Terraform or OpenTofu that has access to the target cloud. You can also use the Zadara Toolbox image (available in the Marketplace) for such purpose as it already contains both Git and Terraform.
Once ready, clone the zadara-examples repository and cd into the \k8s\eksd folder to get started with the automated deployment workflow:
git clone https://github.com/zadarastorage/zadara-examples.git cd zadara-examples/k8s/eksd/ |
Deployment workflow
In most cases, the simplest way to run the automated EKS-D deployment will be the All-in-One wrapper script, which will require only few basic parameters and run both the infrastructure & EKS-D deployment Terraform projects for you, resulting in a running Kubernetes cluster after ~10 minutes and outputting a ready-to-use local admin user’s kubeconfig file. This script can also be used with non-default values as mentioned in the next chapter, but for the sake of simplicity we will run it as-is for now.
In order to run the automated deployment we will need to follow few basic steps:
- Copy the
terraform.tfvars.templatefile toterraform.tfvars - Populate
terraform.tfvarswith the relevant information for our environment - Run the
apply-all.shscript with our AWS credentials
Let’s review the environment’s setup:
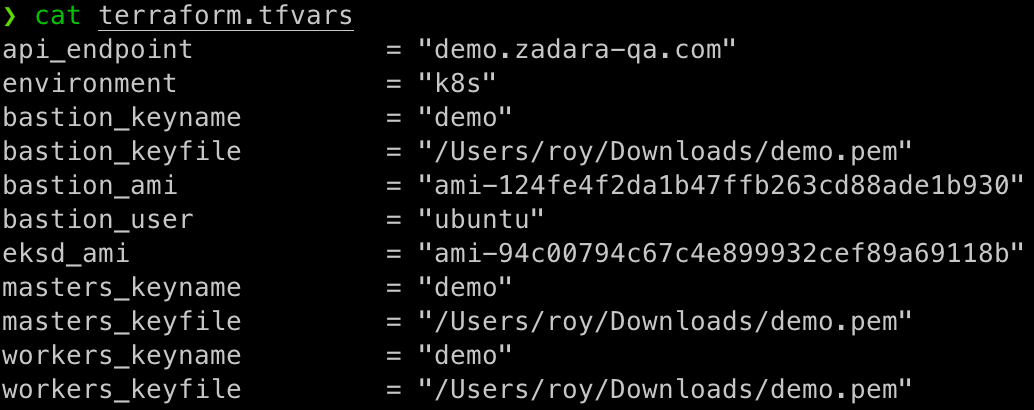
With this configuration, we’re setting the below variables:
api_endpoint– pointing the deployment to my cloud’s base URL
(note the project will be implicitly determined by the AWS credentials)environment– my Kubernetes cluster name (and cloud resources prefix)bastion_keyname– my key-pair name within the Compute cloud for the Bastion VMbastion_keyfile– my private key-pair file location on the executor machinebastion_ami– the Ubuntu 22.04 AMI id as noted in the Compute cloud’s Images listbastion_user– the Ubuntu 22.04 user name (ubuntu is the default user)eksd_ami– the EKS-D AMI id as noted in the Compute cloud’s Images listmasters_keyname– my key-pair name within the Compute cloud for the masters VMsmasters_keyfile– my private key-pair file location on the executor machineworkers_keyname– my key-pair name within the Compute cloud for the workers VMsworkers_keyfile– my private key-pair file location on the executor machine
Please note we used the same key-pair in this demonstration for convenience, but you may use different key-pairs for the bastion, masters & workers VMs if needed. Also note the private key-pair location/s must be fully qualified and not relative as required by Terraform.
Also, make sure both the Ubuntu and EKS-D images are ready (meaning their cloud uploading is finished) within the Compute cloud’s Images list before continuing:
With the configuration all set, we can now run the apply-all.sh script with the user’s AWS credentials as arguments, or as I like to do – as implicit environment variables (for increased security):
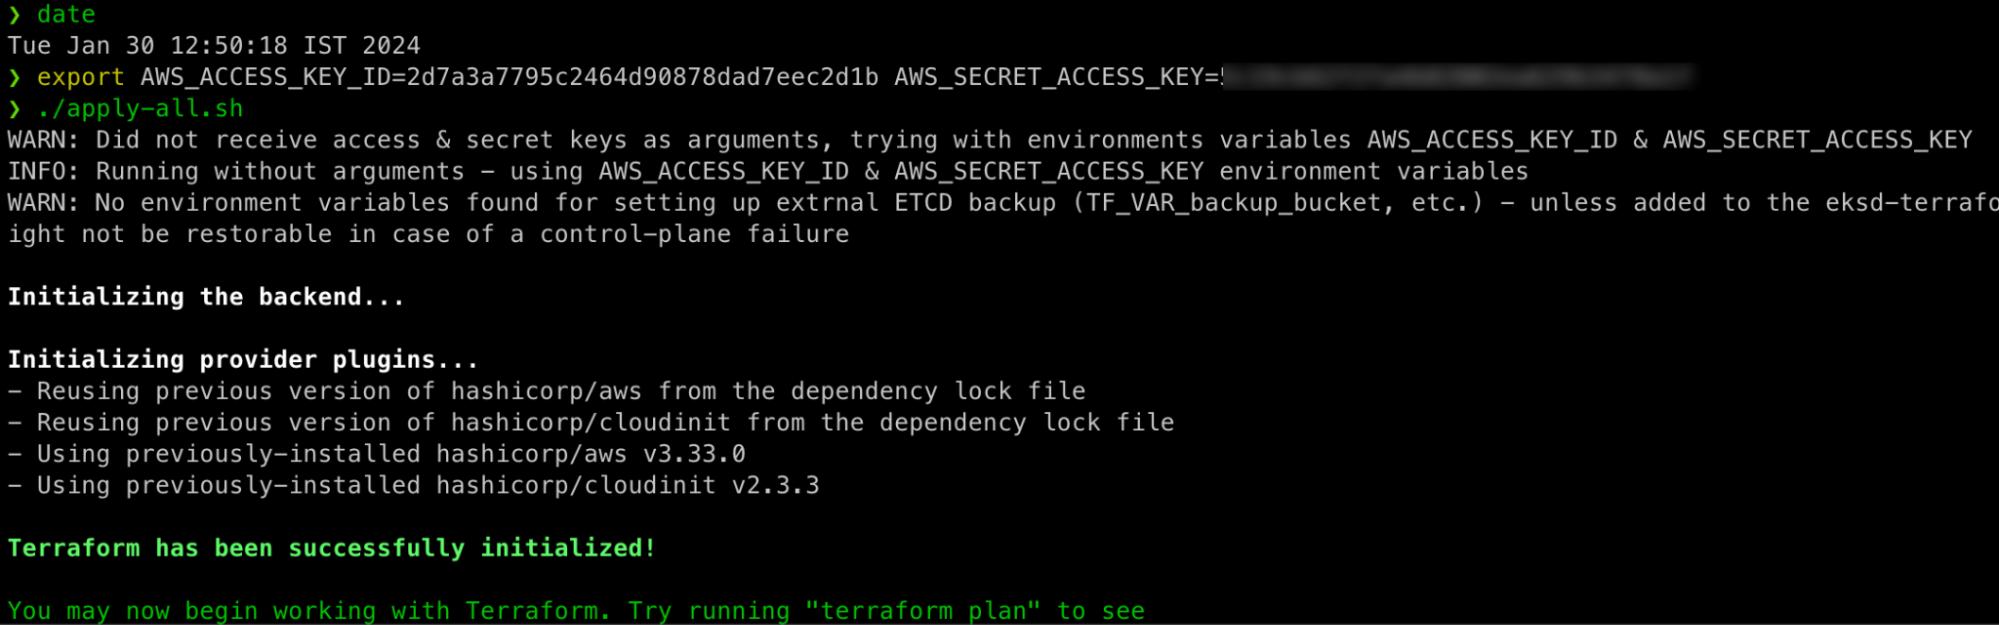
Note the timestamp prior to the invocation, for the default deployment specification the script will run for about 10 minutes and will perform the following operations without prompting the user for any interaction:
- Initialize & apply the infrastructure deployment Terraform project (creating the VPC, subnets, NAT-GW, NLB, etc.)
- Use the Terraform outputs to figure out the NLB’s public IP (by running a predefined script on the Bastion VM)
- Initialize & apply the EKS-D deployment Terraform project (creating the masters/workers ASGs, IAM policies/roles, etc.)
- Use the Terraform outputs to fetch the initial Kubernetes admin user’s kubeconfig from the first master VM (by running another predefined script on the Bastion VM)
Note that the final phase of obtaining the kubeconfig file should take a few minutes (around 20 retry rounds) for a basic configuration, as the Kubernetes control-plane is bootstrapping. The end result is an output of the kubeconfig file, which is also saved in the working directory:
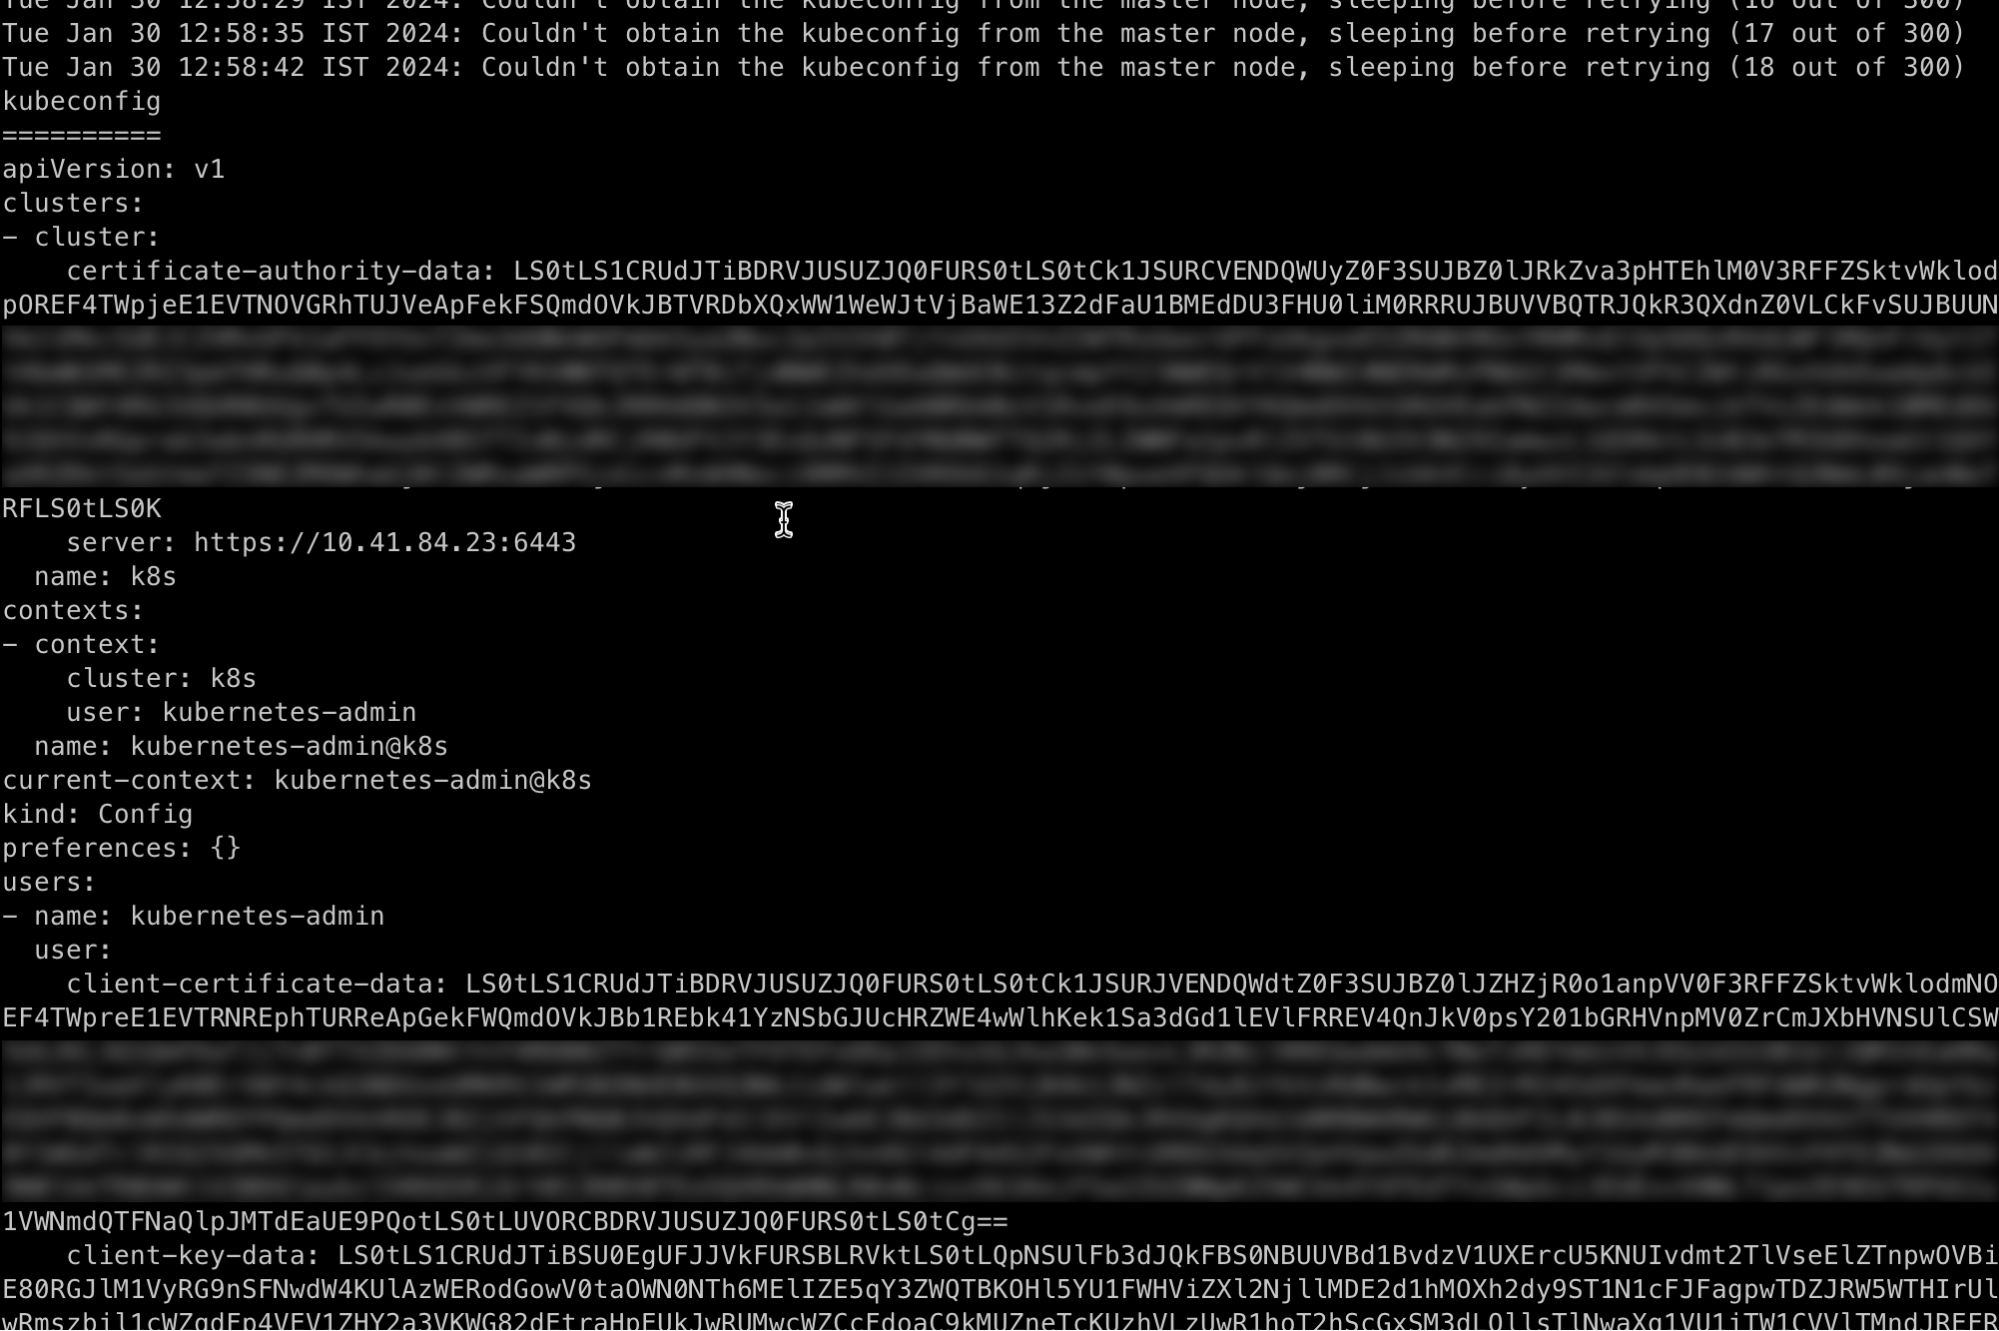
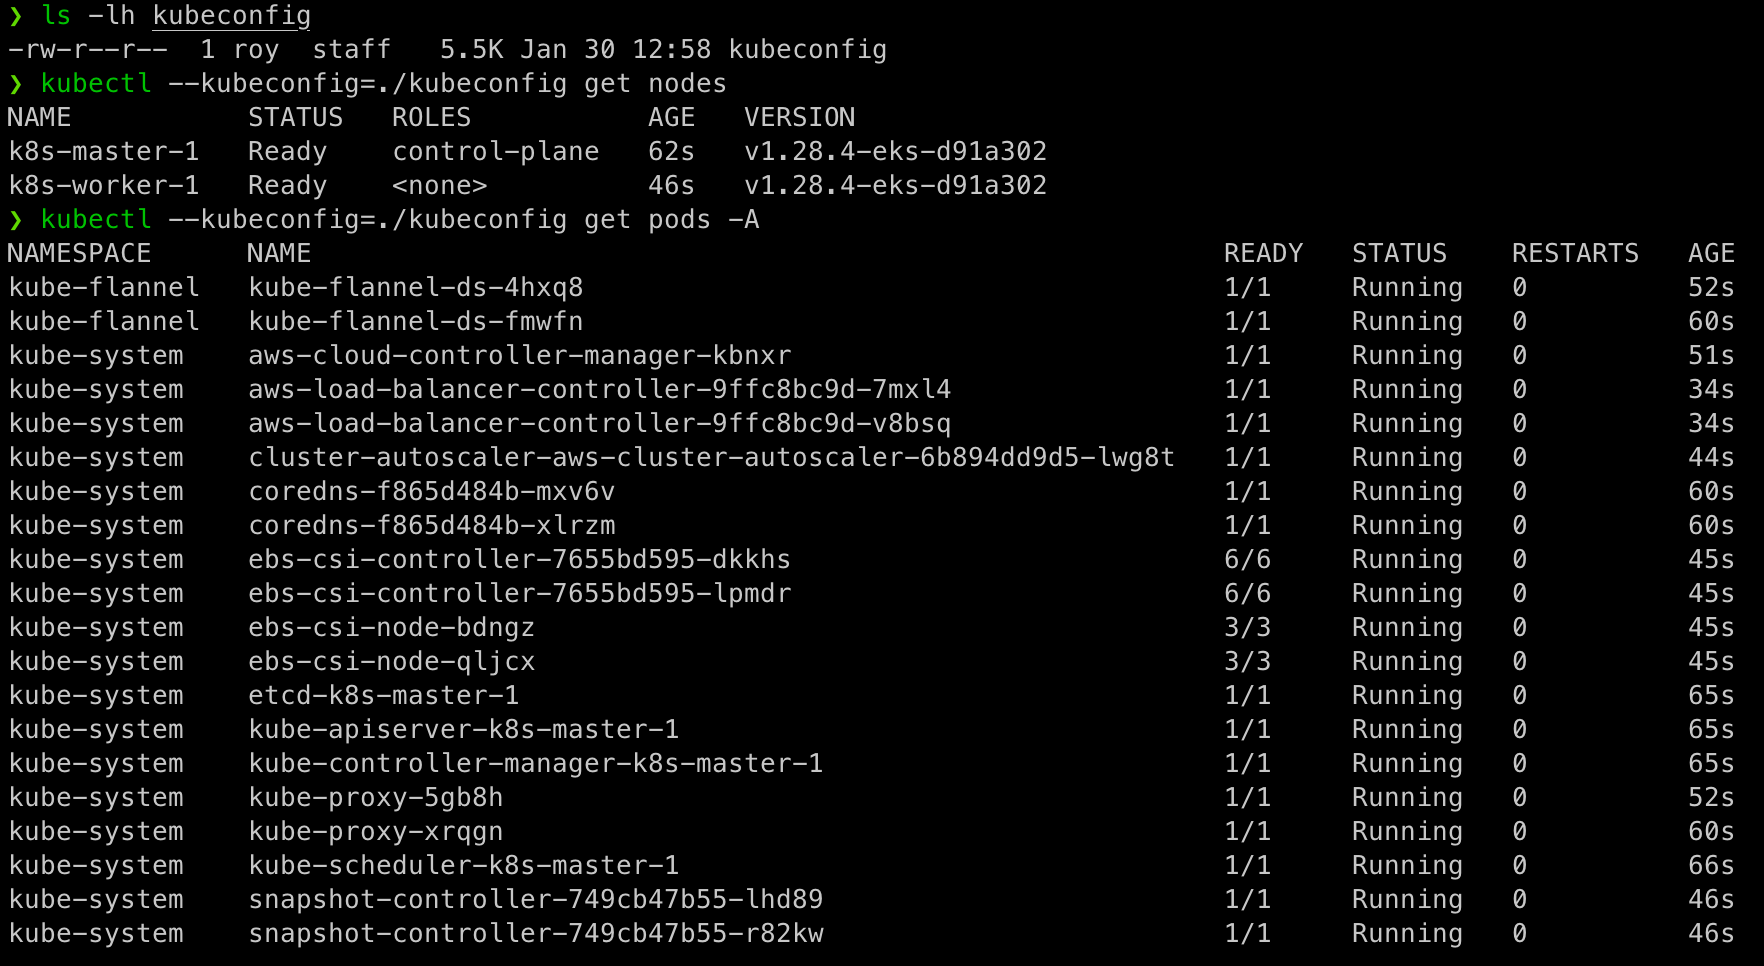
Using this kubeconfig file we can work with kubectl (or any other Kubernetes client, for example k9s or OpenLens) on our newly created Kubernetes cluster:
Apart from the CNI, all other addons are deployed using Helm so we can list them, upgrade and potentially manipulate them as needed:

So there you have it – as promised, from zero to a fully operational Kubernetes cluster on Zadara cloud in less than 10 minutes! We can use this cluster to run actual Kubernetes workload and utilize all of the installed add-ons for seamless cloud services integrations. In fact, in our next blog post we will discuss some of the main use-cases for such Kubernetes usage on Zadara – stay tuned!