Introduction
Cloud migration has become increasingly common as organizations seek more flexible, cost-effective solutions for their infrastructure needs. When you decide to migrate from Azure to Zadara, proper planning is essential for a smooth transition. Zadara offers compelling advantages including a pay-as-you-go pricing model with no hidden fees, no ingress/egress charges, and 24/7 support, making it an attractive alternative to Azure for many businesses.
Why Make the Switch from Microsoft Azure to Zadara?
As cloud infrastructure needs evolve, many organizations find themselves reassessing their current providers. Microsoft Azure has long been a dominant player in the cloud market, but businesses increasingly discover that alternative solutions like Zadara can offer significant advantages tailored to their specific needs.
Cost Pressures Driving Migration Decisions
One of the primary reasons organizations consider migrating from Azure is cost management. Azure’s commitment-based pricing model with tiered structures can create budgeting challenges, especially for growing businesses with fluctuating resource needs. Studies show that companies migrating to Zadara typically experience:
- Up to 30% lower total cost of ownership compared to Azure
- An average 25% reduction in cloud expenses within the first year
- Elimination of unexpected charges for scaling resources up or down
Zadara’s transparent pay-as-you-go model eliminates upfront costs and hidden fees that often appear in Azure bills. Services like automated backups and disaster recovery—frequently charged as add-ons in Azure—come standard with Zadara’s offering.
Technical Advantages Beyond Cost Savings
While cost efficiency drives many migration decisions, Zadara’s technical capabilities provide compelling reasons to switch:
- Dedicated Resources: Unlike Azure’s shared infrastructure model, Zadara provides dedicated VPSAs (Virtual Private Storage Arrays) without oversubscription, resulting in more consistent performance.
- Deployment Flexibility: Zadara can be deployed anywhere—on-premises, in the cloud, or at network edges—giving businesses greater control over their infrastructure.
- Protocol Support: Native support for multiple protocols (FC, iSCSI, NFS, CIFS, S3, Swift) simplifies integration with existing systems.
- Edge Computing Capabilities: For latency-sensitive applications, Zadara’s edge computing infrastructure delivers superior performance compared to centralized cloud models.
Security and Compliance Considerations
Organizations handling sensitive data find Zadara’s security approach particularly attractive. The platform offers:
- Strong encryption for data at rest and in transit
- Role-based access control and two-factor authentication
- Compliance support for regulations like GDPR and HIPAA
- Complete tenant isolation across all domains
This comprehensive security posture helps businesses meet increasingly stringent compliance requirements while maintaining operational efficiency.
Simplified Management and Scaling
Zadara’s architecture allows businesses to start with a half-rack footprint and scale to 100+ nodes as needed. This elastic capacity management eliminates the complex planning often required with Azure’s resource allocation models. For specialized workloads, Zadara also offers GPU infrastructure optimized for enterprise AI applications, providing flexibility that many businesses find lacking in Azure.
With these compelling reasons to migrate, many organizations are making the switch from Azure to Zadara. The following guide will walk you through the complete process to ensure a smooth transition.
The Migration Process: Exporting and Converting Azure VMs
Zadara works with a few Ecosystem partners who provide migration solutions with almost zero downtime.
This guide will walk you through the complete process to migrate your virtual machines from Azure to Zadara with some downtime. We’ll cover the export process, conversion tools, and importing your workloads to Zadara’s zCompute. Whether you’re looking to reduce costs, improve performance, or gain more control over your cloud infrastructure, this step-by-step approach will help ensure a successful migration.
Prerequisites for Migration
Before beginning your migration journey, you’ll need to prepare your environment and gather the necessary tools:
Required Tools
- qemu-img tool – A lightweight conversion utility that can be installed on Ubuntu or macOS systems
- Zadara toolbox with virt-v2v – For more advanced conversion, especially for boot disks
- Access to Azure Portal – With appropriate permissions to export VMs
- Zadara Object Storage access – For storing converted images
Environment Setup
To prepare your environment for migration:
- If you use Ubuntu for conversion, ensure you have sufficient storage space for both the original VHD and converted QCOW2 files
- Verify hardware virtualization is available on your system
- Configure user permissions by updating subuid and subgid files
Understanding the available Azure migration services will help you plan your transition more effectively. While Azure migration services offer various tools, this guide focuses on VM export and conversion methods specifically tailored for Zadara’s environment.
Understanding Azure Migration Services Before Your Transition
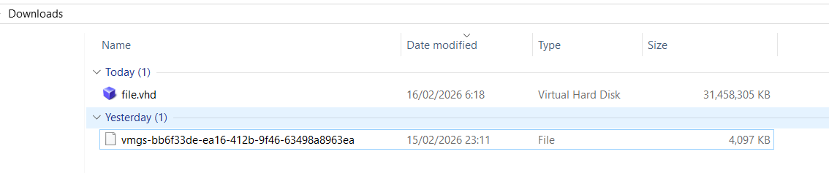
Before diving into the technical steps, it’s important to understand what you’re working with. Azure stores virtual machines as VHD (Virtual Hard Disk) files, which are not natively compatible with Zadara’s zCompute platform.
There are two types of VHDs used in Azure Virtual Machines:
- Image – A VHD that is a template for the creation of a new Azure VM. As a template, it does not have settings such as a machine name, administrative user, and so on.
- Disk – A VHD that can be booted and used as a mountable disk for a VM. Once an image is provisioned, it becomes a disk. There are two types of disks: an OS disk and a data disk.
This fundamental difference necessitates a conversion process.
Many organizations leverage azure migration services as the first step in their cloud transition journey. These services provide various capabilities for moving workloads, but for our specific Azure to Zadara migration, we’ll focus on:
- Azure Export Service – For extracting your VM disks
- Storage Transfer options – For moving large amounts of data
- Conversion utilities – For transforming disk formats
When planning your migration timeline, consider that the export and conversion processes can be time-consuming for larger VMs. A phased approach is often recommended, starting with non-critical workloads to refine your process before moving mission-critical applications.
Step 1: Export from Microsoft Azure
The first phase of your migration journey involves exporting your virtual machines from Azure. Here’s how to accomplish this:
Exporting VM Disks
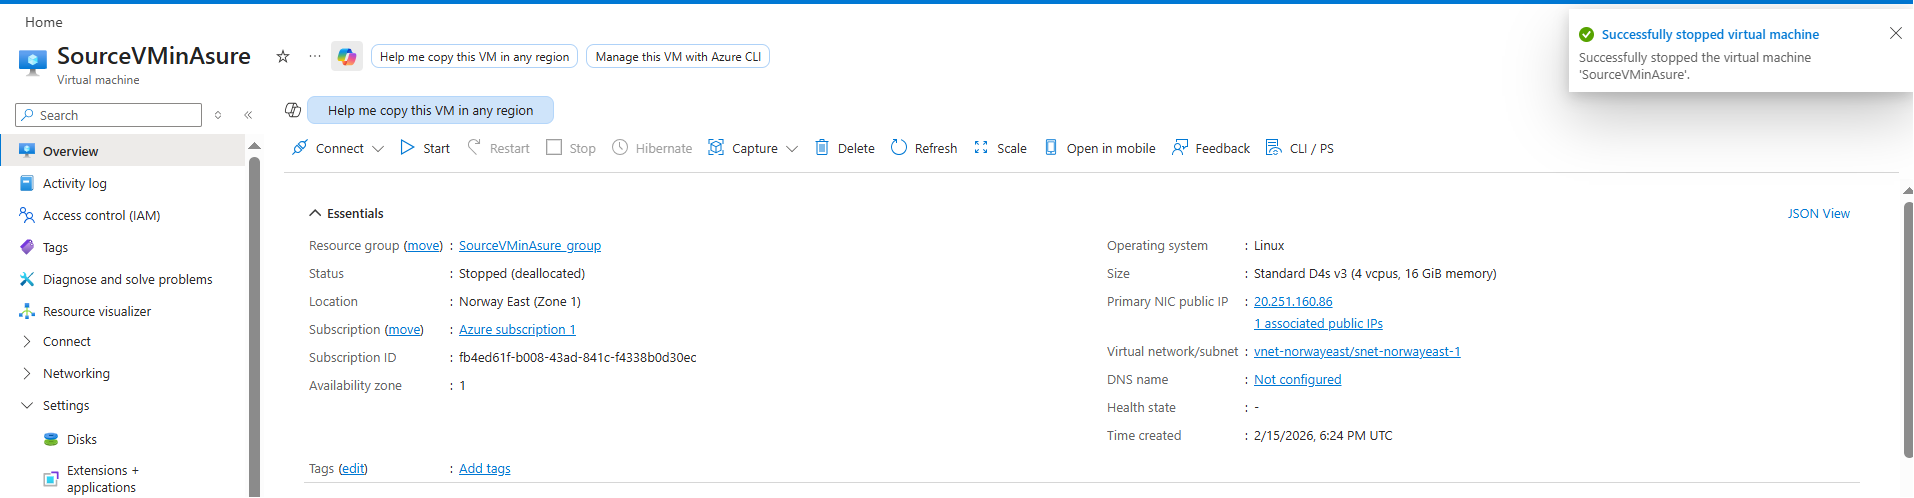
- Log in to the Azure Portal and navigate to your Virtual Machines

- Stop the VM you wish to migrate (this ensures data consistency)

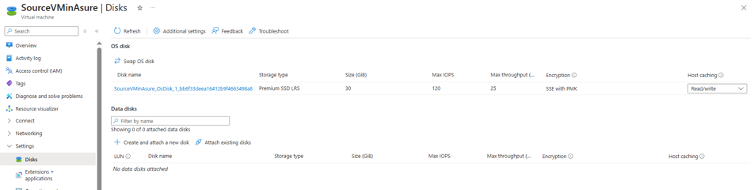
- Navigate to Disks in the VM settings
- Select the managed disk you want to export

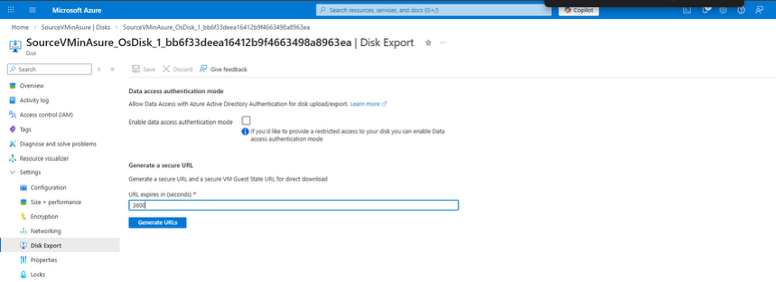
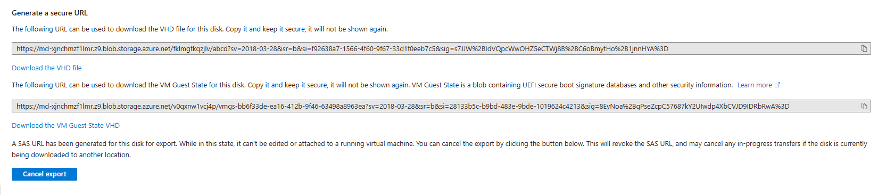
- Generate a SAS URL for the disk with appropriate permissions and expiration time


- Use the SAS URL to download the Azure VHD file to either your local system or directly to Zadara Object Storage (depends on the size of the file). For larger VMs, you may prefer to export directly to Zadara Object Storage rather than downloading locally first. This approach can save significant time and bandwidth.


For downloading Windows VMs, please refer to: https://learn.microsoft.com/en-us/azure/virtual-machines/windows/download-vhd?tabs=azure-portal
Export Considerations
When exporting multiple VMs, consider creating a systematic approach:
- Document all VMs to be migrated, including their dependencies
- Create a migration schedule that minimizes business impact
- Test the export process with a non-critical VM first
- Verify the integrity of exported VHD files before proceeding
Organizations that migrate databases to cloud services often need additional planning for data synchronization. When you migrate database to cloud environments, data integrity and minimal downtime are critical factors. For database VMs, consider implementing a data synchronization strategy to minimize downtime during the final cutover.
Key Considerations When You Migrate Database to Cloud Environments
The approach to migrate databases to cloud platforms differs from VM migration in several important ways. For database workloads:
- Assess database size and activity – Larger, more active databases require more careful planning
- Consider data synchronization options – To minimize downtime during cutover
- Plan for connection string updates – Applications will need to be reconfigured
- Test performance – Ensure the migrated database meets performance requirements
Following best practices for Azure migration will help ensure a successful transition to Zadara. Security and performance testing are key best practices for Azure migration projects that should be incorporated throughout the process.
Step 2: Converting Disk Formats
Once you’ve exported your VMs from Azure, the next step is to convert the VHD to a format compatible with Zadara’s zCompute platform – QCOW2.
Using qemu-img for Conversion (Most Common, Lightweight Recommended Option)
Using qemu-img for VHD to QCOW2 conversion provides a lightweight option for most migration scenarios. For simple Linux VMs without complex configurations, this approach is often sufficient.
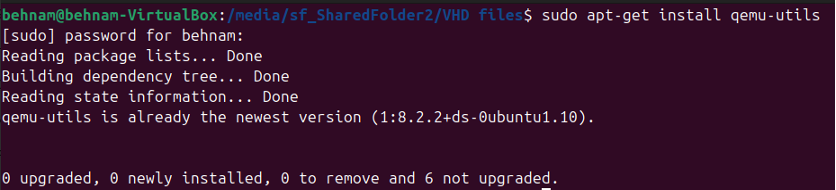
1. Install qemu-img if not already available:
sudo apt-get install qemu-utils # For Ubuntu
brew install qemu # For macOS
2. Run the conversion command (taken from Zadara code):
qemu-img convert -p -O raw source.vhd ‘target.qcow2’
3. Verify the converted file to ensure it’s not corrupted:
qemu-img info target.qcow2

Using virt-v2v for Advanced Conversion (Advanced Option)
For Windows VMs or more complex Linux configurations, virt-v2v offers additional benefits:
- Access the Zadara toolbox with virt-v2v capabilities
- Prepare your environment by running the setup script
- Execute the conversion:
export LIBGUESTFS_BACKEND_SETTINGS=forcetcg
export LIBGUESTFS_CACHEDIR=/home/ilia/v2v-output/
export LIBGUESTFS_BACKEND=directvirt-v2v -i disk source.vhd -o local -of qcow2 -os ./output/
The virt-v2v tool goes beyond simple format conversion by:
- Automatically installing virtio drivers for better performance
- Adjusting boot configurations for KVM compatibility
- Modifying network configurations as needed
- Ensuring proper boot sequence in the new environment
For Windows VMs, the VHD to QCOW2 conversion may require additional driver adjustments. The virt-v2v tool handles most of these automatically, making it the preferred option for Windows workloads.
Step 3: Importing to zCompute
After successfully converting your disk images, it’s time to import them into Zadara’s zCompute platform:
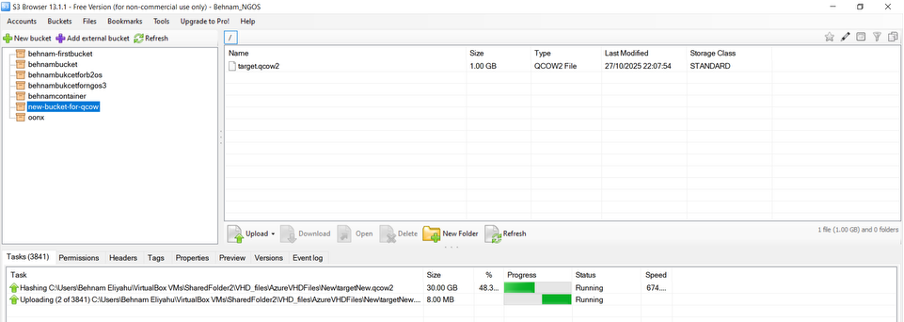
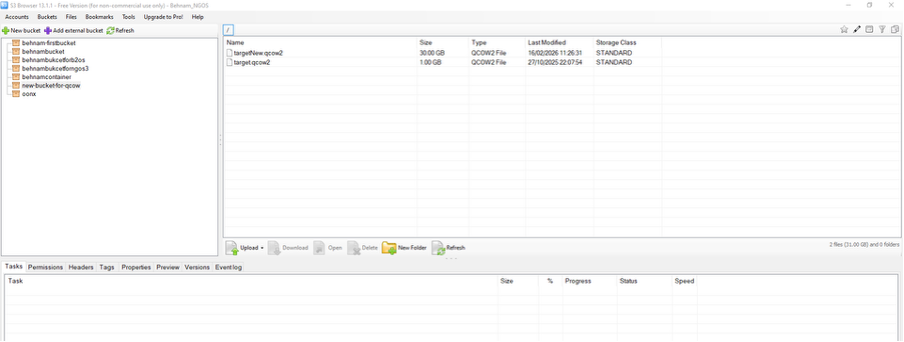
Uploading to Zadara Object Storage
- Access your Zadara Object Storage account
- Create a bucket for your converted images if one doesn’t exist
- Upload the QCOW2 files using S3 or Swift protocols:
# Using AWS CLI
aws s3 cp target.qcow2 s3://your-bucket/images/ --endpoint-url https://your-zadara-endpoint
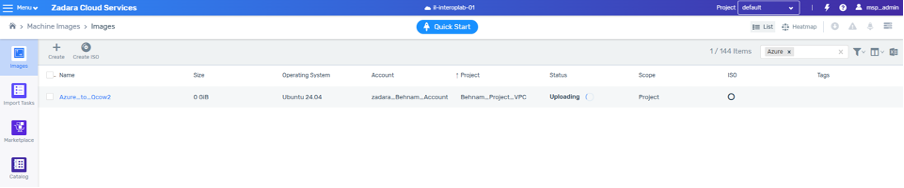
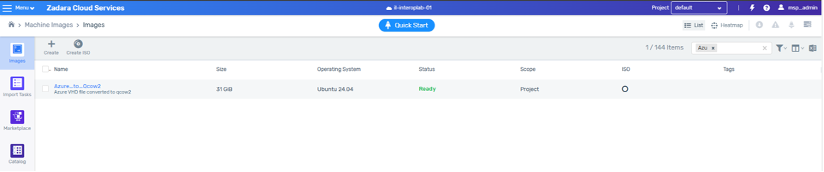
Creating VM Images in zCompute
- Log in to the zCompute console
- Navigate to Images in the dashboard
- Select “Create Image” and provide the following details:
○ Name for the image
○ Description (optional)
○ Source URL pointing to your object storage
○ Format (QCOW2)
○ OS type (Windows or Linux)
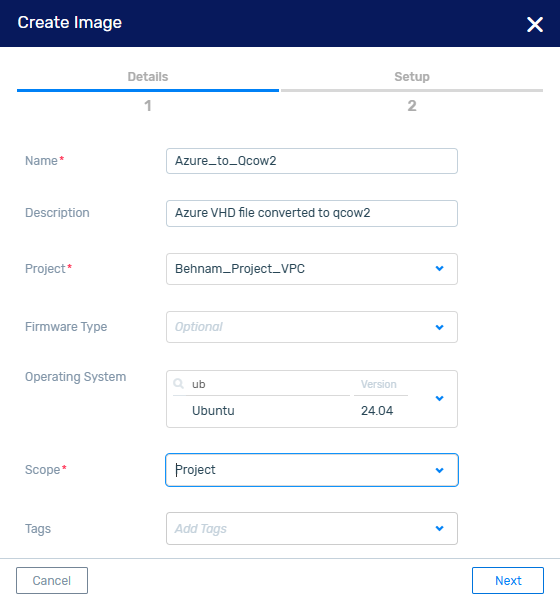
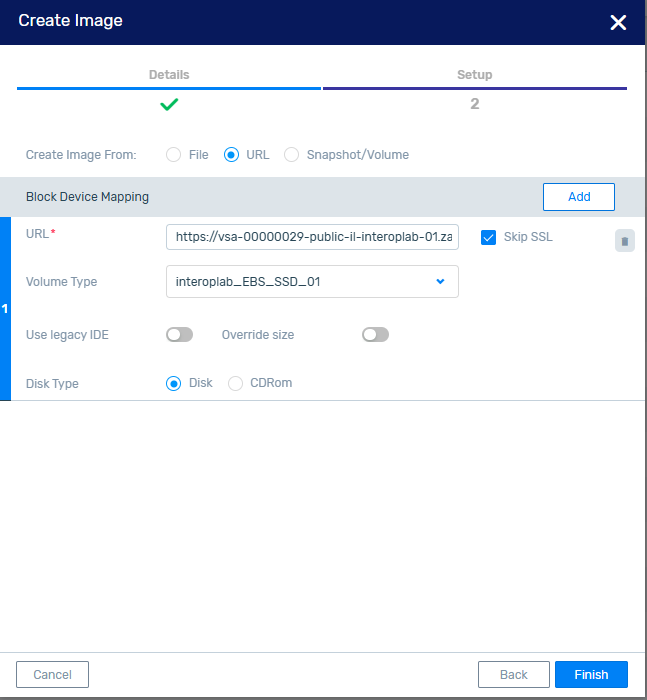
4. Click “Create” and wait for the image creation process to complete
Launching VMs from Images
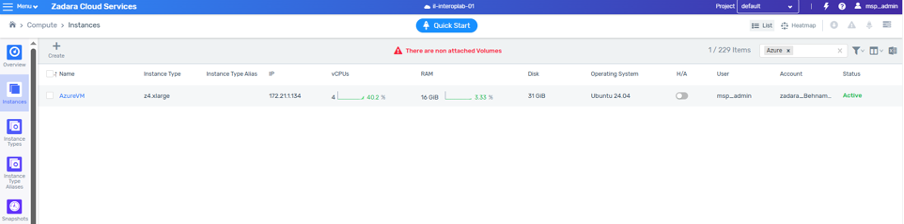
- Navigate to Instances in the zCompute console
- Click “Launch Instance”
- Select your newly created image
- Configure instance details:
○ Instance type (CPU/RAM)
○ Network settings
○ Security groups
○ Storage options
5. Launch the instance and monitor the startup process
The final phase of your zCompute migration involves configuring networking and security settings.
The Active Directory (AD) connection and permissions should be dealt with caution. It possibly needs to re-add to domain.
Testing is a critical component of any zCompute migration to ensure applications function as expected before finalizing the cutover.
Best Practices for Azure Migration to Ensure Success
Documentation and rollback planning are essential best practices for Azure migration that should not be overlooked. To ensure a successful migration:
- Create detailed documentation of your current Azure environment
- Develop a rollback plan in case issues arise during migration
- Test thoroughly before cutting over production workloads
- Implement monitoring to quickly identify any post-migration issues
- Plan for a transition period where both environments may run in parallel
Security and performance testing are key best practices for Azure migration projects. Before finalizing your migration, conduct comprehensive security assessments and performance testing to ensure your workloads operate as expected in the new environment.
How to Migrate Azure Tenant Resources Effectively
When planning to migrate azure tenant resources, consider these additional factors:
- Identity and access management – How user accounts and permissions will be handled
- Service dependencies – Identifying all interconnected services
- Networking configurations – Ensuring proper connectivity in the new environment
- Compliance requirements – Maintaining regulatory compliance during and after migration
Organizations looking to migrate from Azure to Zadara can benefit from the cost-effective pricing model with no hidden fees. The pay-as-you-go approach eliminates the need for long-term commitments while providing enterprise-grade capabilities.
Step 4: Post-Migration Adjustments
After importing your VMs to zCompute, some adjustments may be necessary to ensure optimal performance:
For VMs Converted with qemu-img
If you used qemu-img for conversion, you might need to:
- Manually install virtio drivers for Windows VMs
- Update network configurations to match the new environment
- Adjust boot configurations in GRUB for Linux VMs
- Update any hardcoded IP addresses or hostnames
For VMs Converted with virt-v2v
VMs converted with virt-v2v typically require fewer adjustments, but you should still:
- Verify network connectivity is functioning properly
- Check that all services start correctly on boot
- Test application functionality thoroughly
- Update any documentation with new IP addresses or configurations
Proper planning can significantly reduce downtime during your zCompute migration process. By thoroughly testing each VM after migration, you can identify and address issues before they impact your production environment.
Troubleshooting Common Migration Issues
Even with careful planning, you may encounter challenges during migration. Here are solutions to common issues:
Boot Problems
If your VM fails to boot after migration:
- Check boot order in the VM settings
- Verify that drivers are properly installed
- Review system logs for specific error messages
- Consider converting again with virt-v2v if you initially used qemu-img
Network Connectivity Issues
If your VM boots but has network problems:
- Verify network interface configuration
- Check security group settings in zCompute
- Ensure proper subnet configuration
- Update any static IP configurations
Performance Concerns
If you notice performance degradation:
- Compare resource allocation between Azure and Zadara
- Check for missing drivers or optimizations
- Monitor resource utilization to identify bottlenecks
- Adjust VM size as needed for optimal performance
Conclusion
The process to migrate from Azure to Zadara involves exporting VMs, converting disk formats, and importing to zCompute. While it requires careful planning and execution, the benefits—including cost savings and enhanced control—make it worthwhile for many organizations.
By following this guide and adhering to best practices, you can achieve a successful migration with minimal disruption to your operations. Remember that migration is not just a technical process but also an opportunity to optimize your infrastructure and improve your overall cloud strategy.
For complex migrations or enterprise environments, consider engaging with Zadara’s professional services team for additional support and guidance. Their expertise can help streamline the process and address any unique challenges in your environment.
Ready to begin your migration journey? Start by assessing your current Azure environment and creating a detailed migration plan based on the steps outlined in this guide.